Today we have a special bonus blog post from Woolly Wormhead, who shares a tutorial for knitting brioche into the row below. It's great for those of you participating in the Muratura KAL, which we are sponsoring. Be sure to check out the Woolly Wormhead blog for details on the KAL (plus a coupon code for your pattern purchase!), and also don't forget to enter our blog giveaway for December, found here.
Knitting into the row below is a variation of Brioche knitting, and creates a wonderfully textured
stitch pattern on what is a garter stitch ground. It is used in my Muratura and Rainbow Warrior
patterns, and it isn't as yarn thirsty as other brioche stitches (knitting into the row below doesn't use as much yarn as creating a yarnover).
The usual abbreviation for knitting into the row below is 'K1b'. This stitch is usually worked on
alternate stitches, and is offset on RS rows to create the pattern.
 1. Knit up to the stitch that has the K1b instruction. On a piece of knitting worked flat, the 1st row is usually *K1, K1b; rpt; the 2nd & 4th rows are knit across. The 3rd row would then be *K1b, K1; rpt. When working in the round, the 2nd & 4th rounds would be purl across.
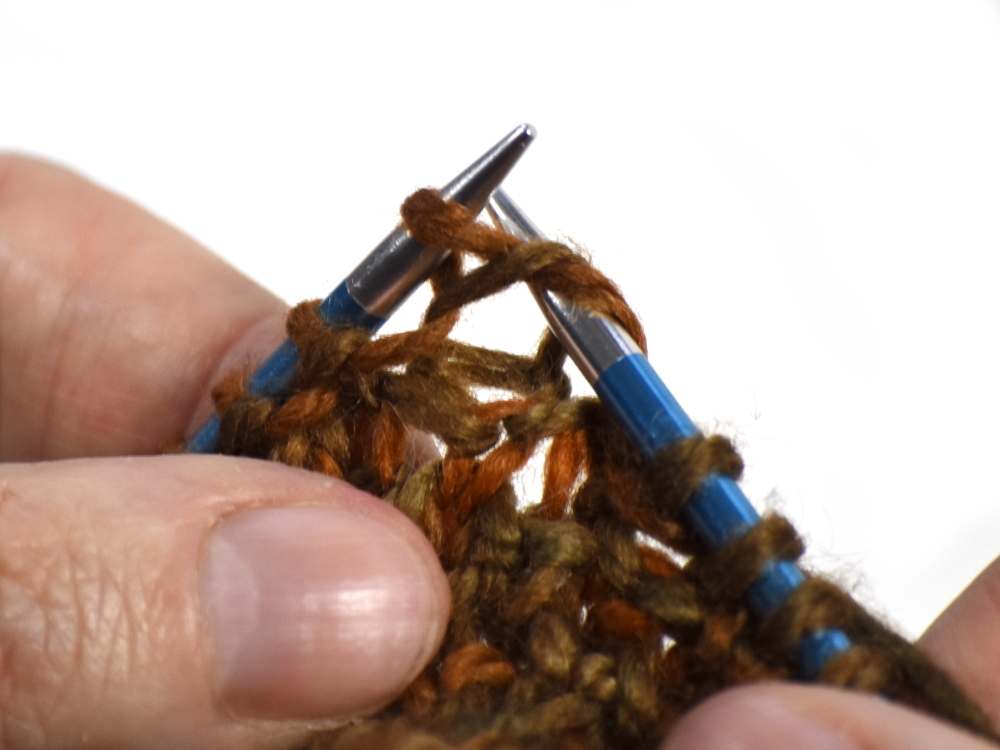
 2. Insert your needle into the stitch below the one on the left hand needle, as shown.

3. Bring your yarn around and perform a knit stitch.

4. This is the completed knit stitch, with the worked stitch still on the left hand needle – here you can see clearly how you have knit through both loops together.

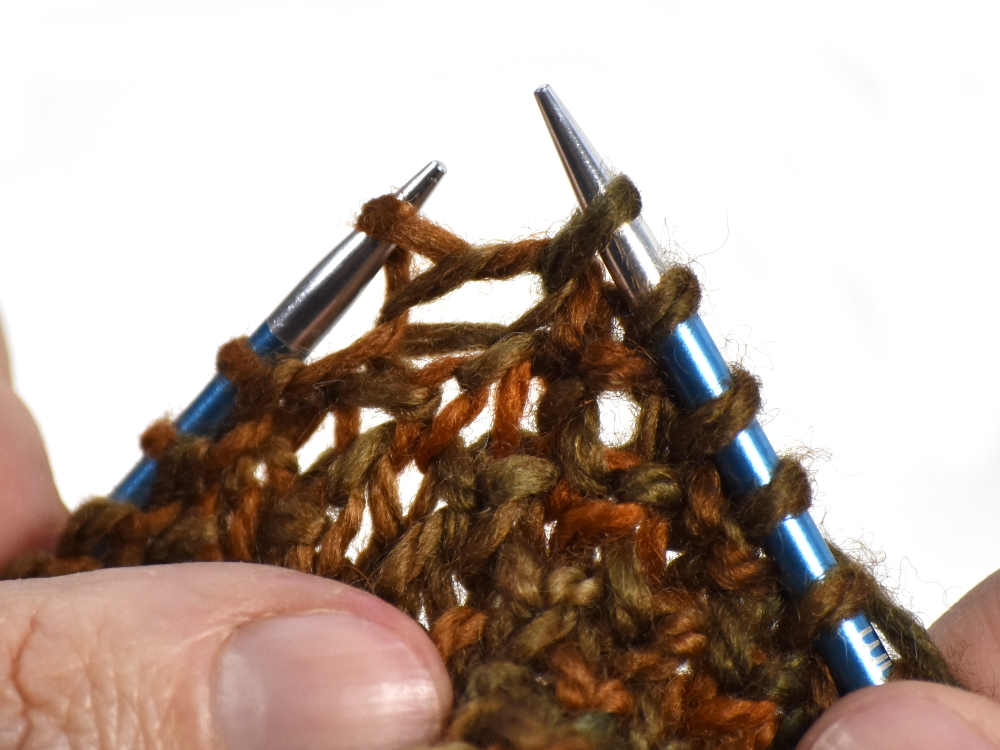
5. Then slip the worked stitch off the needle, and done! It's much simpler than it first seems.
Copyright Woolly Wormhead © 2016. Used With Permission; All rights reserved.
Website: http://woollywormhead.com
Ravelry: http://www.ravelry.com/groups/woolly-wormheads-hats
Knitting into the row below is a variation of Brioche knitting, and creates a wonderfully textured
stitch pattern on what is a garter stitch ground. It is used in my Muratura and Rainbow Warrior
patterns, and it isn't as yarn thirsty as other brioche stitches (knitting into the row below doesn't use as much yarn as creating a yarnover).
The usual abbreviation for knitting into the row below is 'K1b'. This stitch is usually worked on
alternate stitches, and is offset on RS rows to create the pattern.

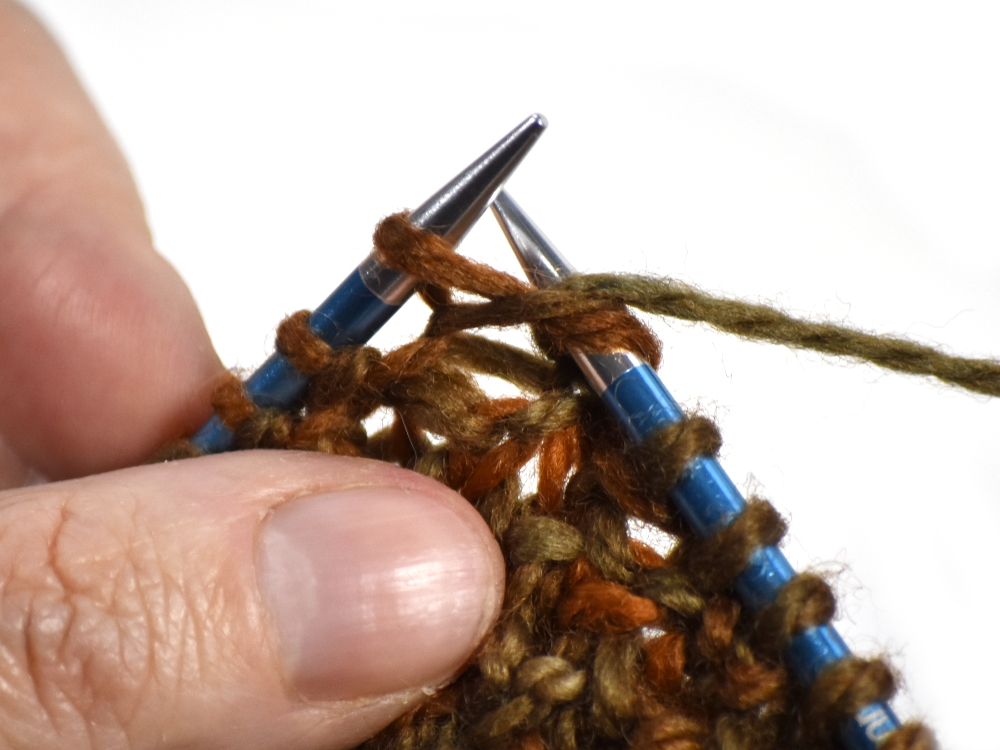
3. Bring your yarn around and perform a knit stitch.
4. This is the completed knit stitch, with the worked stitch still on the left hand needle – here you can see clearly how you have knit through both loops together.

5. Then slip the worked stitch off the needle, and done! It's much simpler than it first seems.
Copyright Woolly Wormhead © 2016. Used With Permission; All rights reserved.
Website: http://woollywormhead.com
Ravelry: http://www.ravelry.com/groups/woolly-wormheads-hats
No comments:
Post a Comment